
使用Github Action实现全自动部署
通过Github Action,将繁琐的部署交给云端

本文内容参考自akilar, 建议前往原文阅览更详细的教程。
GitHub Actions 简介
在 GitHub Actions 的仓库中自动化、自定义和执行软件开发工作流程。 您可以发现、创建和共享操作以执行您喜欢的任何作业(包括 CI/CD),并将操作合并到完全自定义的工作流程中。
hexo clean hexo g -d
每次写文后部署Hexo都需要运行这几个指令,文章少还好,文章多起来之后,编译的时间也会随之增加。通过GitHub Action,就可以省略自己输指令部署,将改动推送到远程仓库后,其他的任务交给CI就好。
所需常量声明
| 常量名 | 常量释义 |
|---|---|
| Blogroot | 本地存放博客源码的文件夹路径 |
| SourceRepo | 存放博客源码的私有仓库名 |
| SiteBlogRepo | 存放编译好的博客页面的公有仓库名 Site 指站点,教程中会替换成 Github、Gitee、Coding |
| SiteUsername | 用户名 Site 指站点,教程中会替换成 Github、Gitee、Coding |
| SiteToken | 申请到的令牌码 Site 指站点,教程中会替换成 Github、Gitee、Coding |
| GithubEmail | 与 github 绑定的主邮箱,建议使用 Gmail |
| TokenUser | Coding 配置特有的令牌用户名 |
GitHub Action 快速开始
获取Token
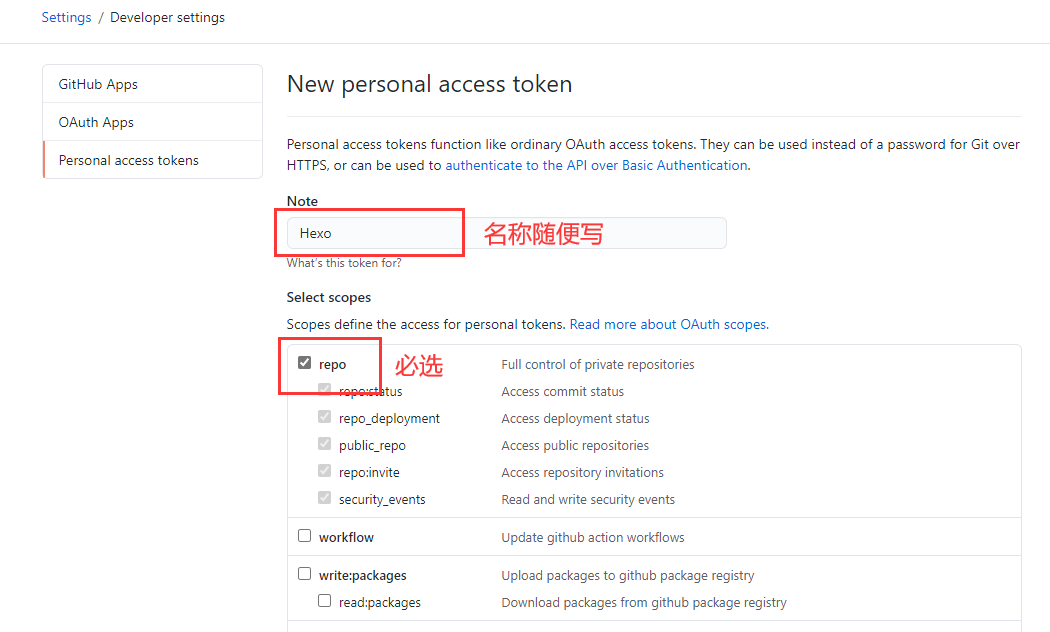
为了确保交由 Github Action 来持续部署时,Github Action 具备足够的权限来进行 hexo deploy 操作,需要先获取 Token,博主分别在 Github、Coding 处部署了静态页面,所以也就需要获取这两处的 Token。
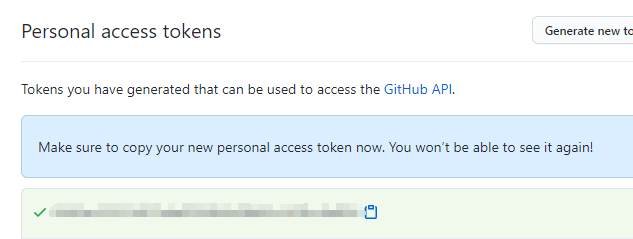
访问 Github-> 头像(右上角)->Settings->Developer Settings->Personal access tokens->

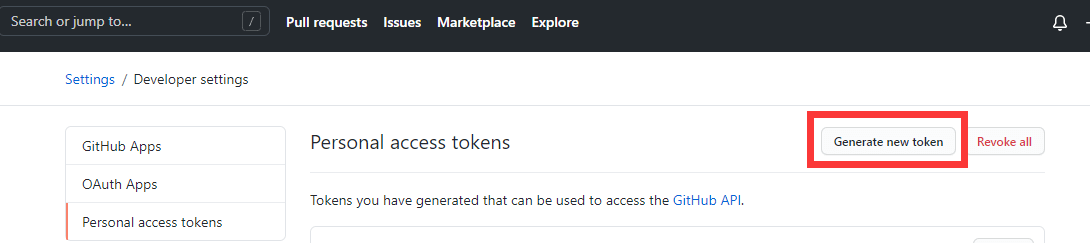
Token只会显示一次,之后无法查看,请务必记下来,若丢失则只能重新生成Token码重新配置。
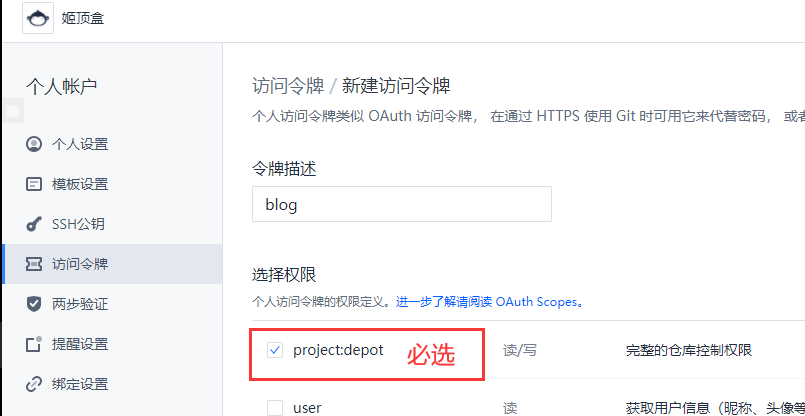
访问 Coding-> 头像(右上角)-> 个人账户设置 -> 访问令牌 -> 新建令牌。
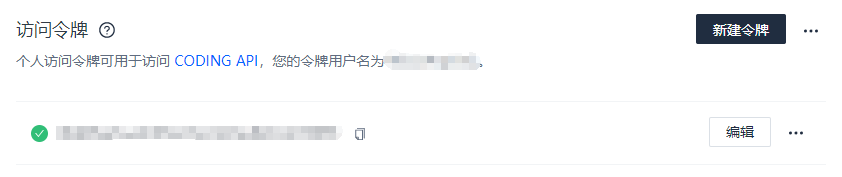
Coding还需要配置令牌用户名TokenUser,同GitHub一样,Token码只会出现一次。
创建存放源码的私有仓库
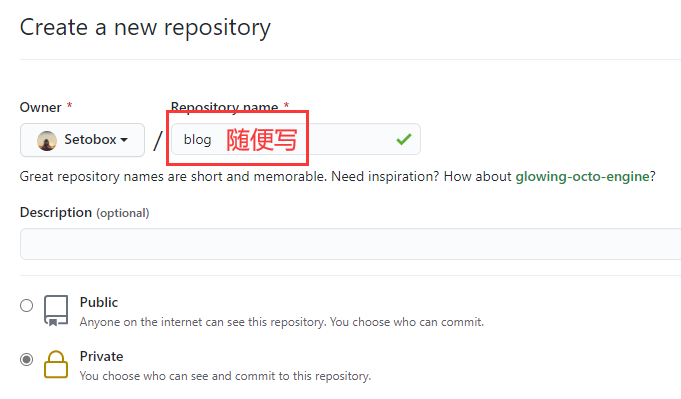
我们需要创建一个私有仓库SourceRepo用来存放Hexo博客源码,创建完成后,需要把源码push到仓库中。首先获取远程仓库地址,此处虽然SSH和HTTPS均可。SSH在绑定过sshkey的设备上无需再输入密码,HTTPS则需要输入密码,但是SSH偶尔会遇到端口占用的情况。请自主选择。
之所以是私有仓库,是因为配置中会写有Token,别人拿到Token可以随意操作你的github仓库内容。
配置deploy项
打开站点配置文件_config.yml,找到deploy配置项,使用之前生成的Token和各个站点仓库推送地址。
deploy:
  type: git
  repo:
    gitHub: https://[GithubUsername]:[GithubToken]@github.com/[GithubUsername]/[GithubBlogRepo].git
    gitee: https://[GiteeUsername]:[GiteeToken]@gitee.com/[GiteeUsername]/[GiteeBlogRepo].git
    coding: https://[TokenUser]:[CodingToken]@e.coding.net/[CodingUsername]/[CodingBlogRepo].git
  branch: master #2020年10月后github新建仓库默认分支改为main,注意更改
配置GitHub Action
在Hexo根目录新建 .github 文件夹,注意前面有个.的。然后在.github内新建workflows文件夹,在workflows文件夹内新建autodeploy.yml,在此yml文件内输入
# 当有改动推送到master分支时,启动Action
name: 自动部署

on:
  push:
    branches:
      - master #2020年10月后github新建仓库默认分支改为main,注意更改

  release:
    types:
      - published

jobs:
  deploy:
    runs-on: ubuntu-latest
    steps:
    - name: 检查分支
      uses: actions/checkout@v2
      with:
        ref: master #2020年10月后github新建仓库默认分支改为main,注意更改

    - name: 安装 Node
      uses: actions/setup-node@v1
      with:
        node-version: "12.x"

    - name: 安装 Hexo
      run: |
        export TZ='Asia/Shanghai'
        npm install hexo-cli -g

    - name: 缓存 Hexo
      uses: actions/cache@v1
      id: cache
      with:
        path: node_modules
        key: ${{runner.OS}}-${{hashFiles('**/package-lock.json')}}

    - name: 安装依赖
      if: steps.cache.outputs.cache-hit != 'true'
      run: |
        npm install --save

    - name: 生成静态文件
      run: |
        hexo clean
        hexo generate

    - name: 部署
      run: |
        git config --global user.name "[GithubUsername]"
        git config --global user.email "elpsycongri@qq.com"
        git clone https://github.com/[GithubUsername]/[GithubBlogRepo].git .deploy_git
        # 此处务必用HTTPS链接。SSH链接可能有权限报错的隐患
        # =====注意.deploy_git前面有个空格=====
        # 这行指令的目的是clone博客静态文件仓库,防止Hexo推送时覆盖整个静态文件仓库,而是只推送有更改的文件
        hexo deploy
重新设置远程仓库和分支
添加屏蔽项
能够使用指令进行安装的内容不包括在需要提交的源码内, 这样可以显著减少需要提交的文件量和加快提交速度。 打开 Blogroot/.gitignore, 输入以下内容:
.DS_Store
Thumbs.db
db.json
*.log
node_modules/
public/
.deploy*/
.deploy_git*/
.idea
themes/butterfly/.git
注意:如果不是butterfly主题,最后一行内容需要替换为当前使用的主题
提交源码到私有仓库SourceRepo
在博客根目录下启动终端,使用git指令重设仓库地址。这样在新建仓库,我们仍旧可以保留珍贵的 commit history,便于版本回滚。
git remote rm origin # 删除原有仓库链接
git remote add origin git@github.com:[GithubUsername]/[SourceRepo].git #[SourceRepo]为新的存放源码的github私有仓库
git checkout -b master # 切换到master分支,
#2020年10月后github新建仓库默认分支改为main,注意更改
# 如果不是,后面的所有设置的分支记得保持一致
# 2020年10月以后,新建仓库的默认分支换成main
git add .
git commit -m "github action update"
git push origin master
#2020年10月后github新建仓库默认分支改为main,注意更改
查看部署情况
打开私有仓库,找到Actions